Preface:
What I'm going to show you I did over the course of 4 or 5 days (I bought the organizing boxes for my project area one day, I put stuff into the organizing boxes another day, I did the drawer a 3rd day, and the cupboard 4th or 5th day).
Where to start:
Whenever I start cleaning, I always pick an area in the kitchen. I started with the little kitchen counter that you saw in my explanation of the Power of 10. Now, as I get into the actual "clearing" aspect of all this, I decided to start with a pretty easy area for me, which is the cupboard next to the dishwasher - and I wish I'd taken photos of the drawer and cupboard before because TRUST ME! it did NOT look like this - what you're going to see is actual what it looks like after I went through both of these last year in an attempt to organize and clean up my place.
As you get into your cleaning and clearing, I think it's important to figure out where you want to set your "bar" for success. Personally, and let's be honest, I'm setting my bar pretty darn low. Because I want to be successful at this, and I want to know that I am improving my living space, albeit slowly. You can work as quickly as you'd like, but I think, similarly to an exercise routine, it's important to start slow because I know that as I get into the, shall we say, more deeply entrenched areas of my place (i.e. spaces that have things that are going to be more difficult to go through), I'll have this past build-up of successes that will hopefully help me get through them, and know that I can get through them. Plus, I have all of you out there reading and watching, which frankly is an added bonus and helps spur me on - we can do this!
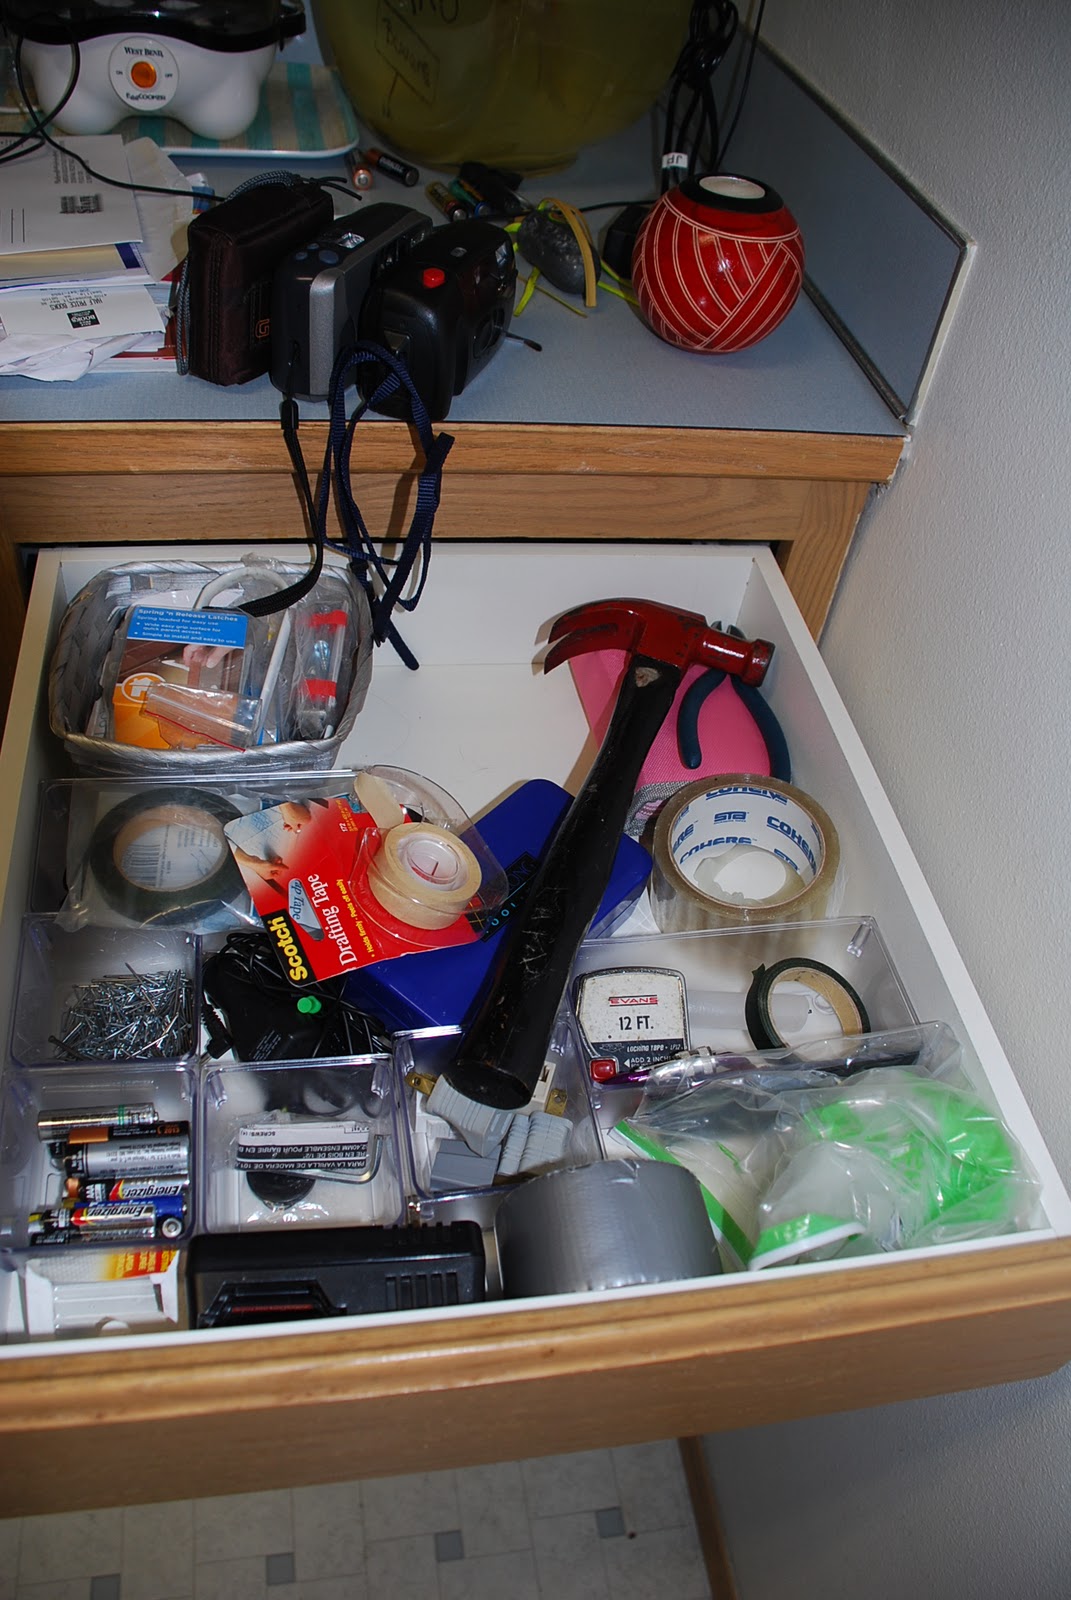
Okay - Kitchen Drawer:
 | ||||
| The before picture |
Step 1:
Pick out the items you can see right away don't belong and put them where they should go*
*And I know they don't belong because I made a place for my main camera in my project desk, so when I saw these 3 cameras in here, I knew right away where they actually belong...
 | ||
| They belong here - inside the box I bought to fit my camera |
Step 2:
Group "like" items together
This is my "doo-dad" drawer; and like I said before, I organized this drawer previously. I bought these little organizer boxes at Fred Meyer after I grouped all the things together I knew needed to be together - which therefore gave me an idea what size containers they would all need. I've got one for: Nails, batteries, outlet changers (for some reason I have many); miscellaneous (the button, screws, etc.); another sort of miscellaneous one (measuring tape, hook); nightlights, then there's a basket in back with bags of screws and instructions that go with various pieces of my furniture.


I also have a couple rolls of masking tape, and one roll of drafting tape. Given the space perameters, the masking tape went in back - and set on top of that are my little tool boxes. The drafting tape fits between one container and another, and shifting all this around freed up the space I needed for the hammer to have its own space rather than teetering on top, making it hard to get the drawer closed!
It's like a puzzle. Once you know what pieces need their own space, and what space you're trying to fit everything into, you can start figuring out how to get everything into its own space inside.

Step 3:
Clear away extraneous things
This is the tricky part - and why I started with this drawer because there's nothing in here really that I'm terribly attached to - though as I'm writing this I'm wondering if I should get rid of those 3 outlet changer things. What to ask yourself as you're trying to decide what to clear, pick out the things that:
a) don't work anymore
b) you don't or have never used and can't think when you will again
c) don't belong in your newly organized area
 |
| Going into the Take Out box (and recycling) |
2.) headphones: this particularly brand hurts my ears and I never use them - when mine break, I buy a different kind that doesn't hurt my ears
3.) drafting tape paper backing
4.) hook container wrapper
5.) microphone attachment? It's a single headphone with an attachment to... ?
6.) car charger for.... ?
 |
| 4 of my 7 weekly Take Out items (the 2 paper wrappers went into the recycling bin) |
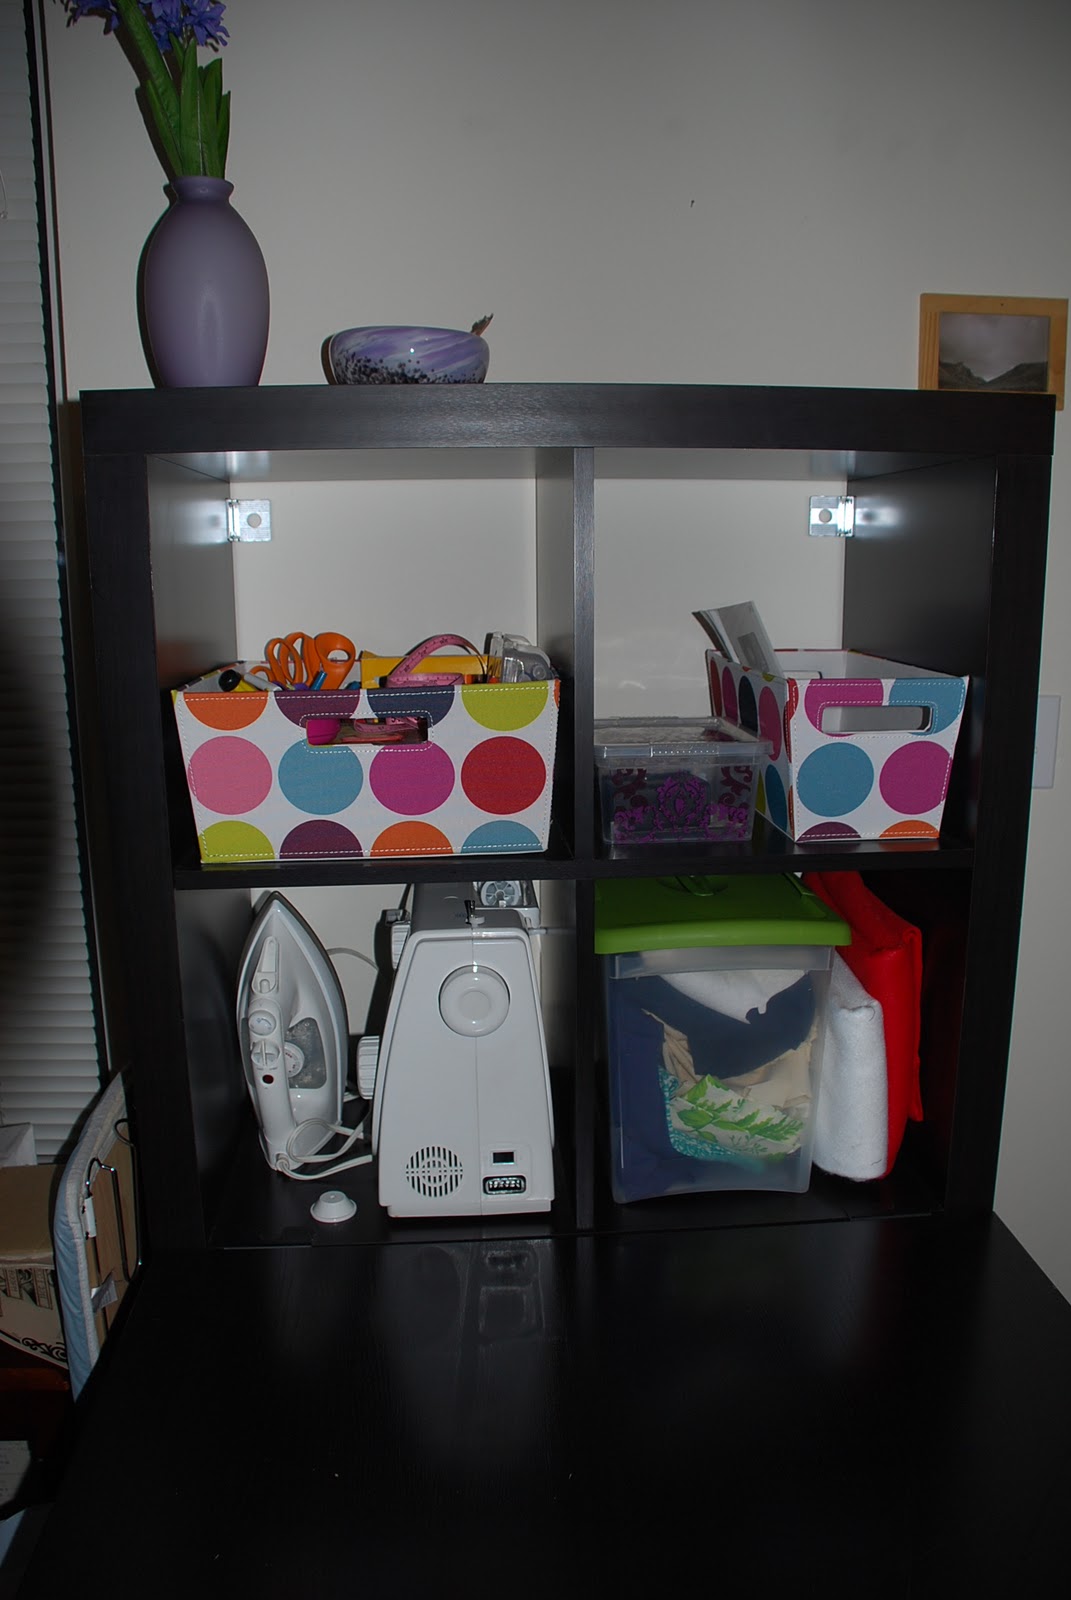
Oh - and - my Project Desk (before and after photos)


AFTER
 |
| 1 storage container for camera parts; 1 organizer for camera itself |
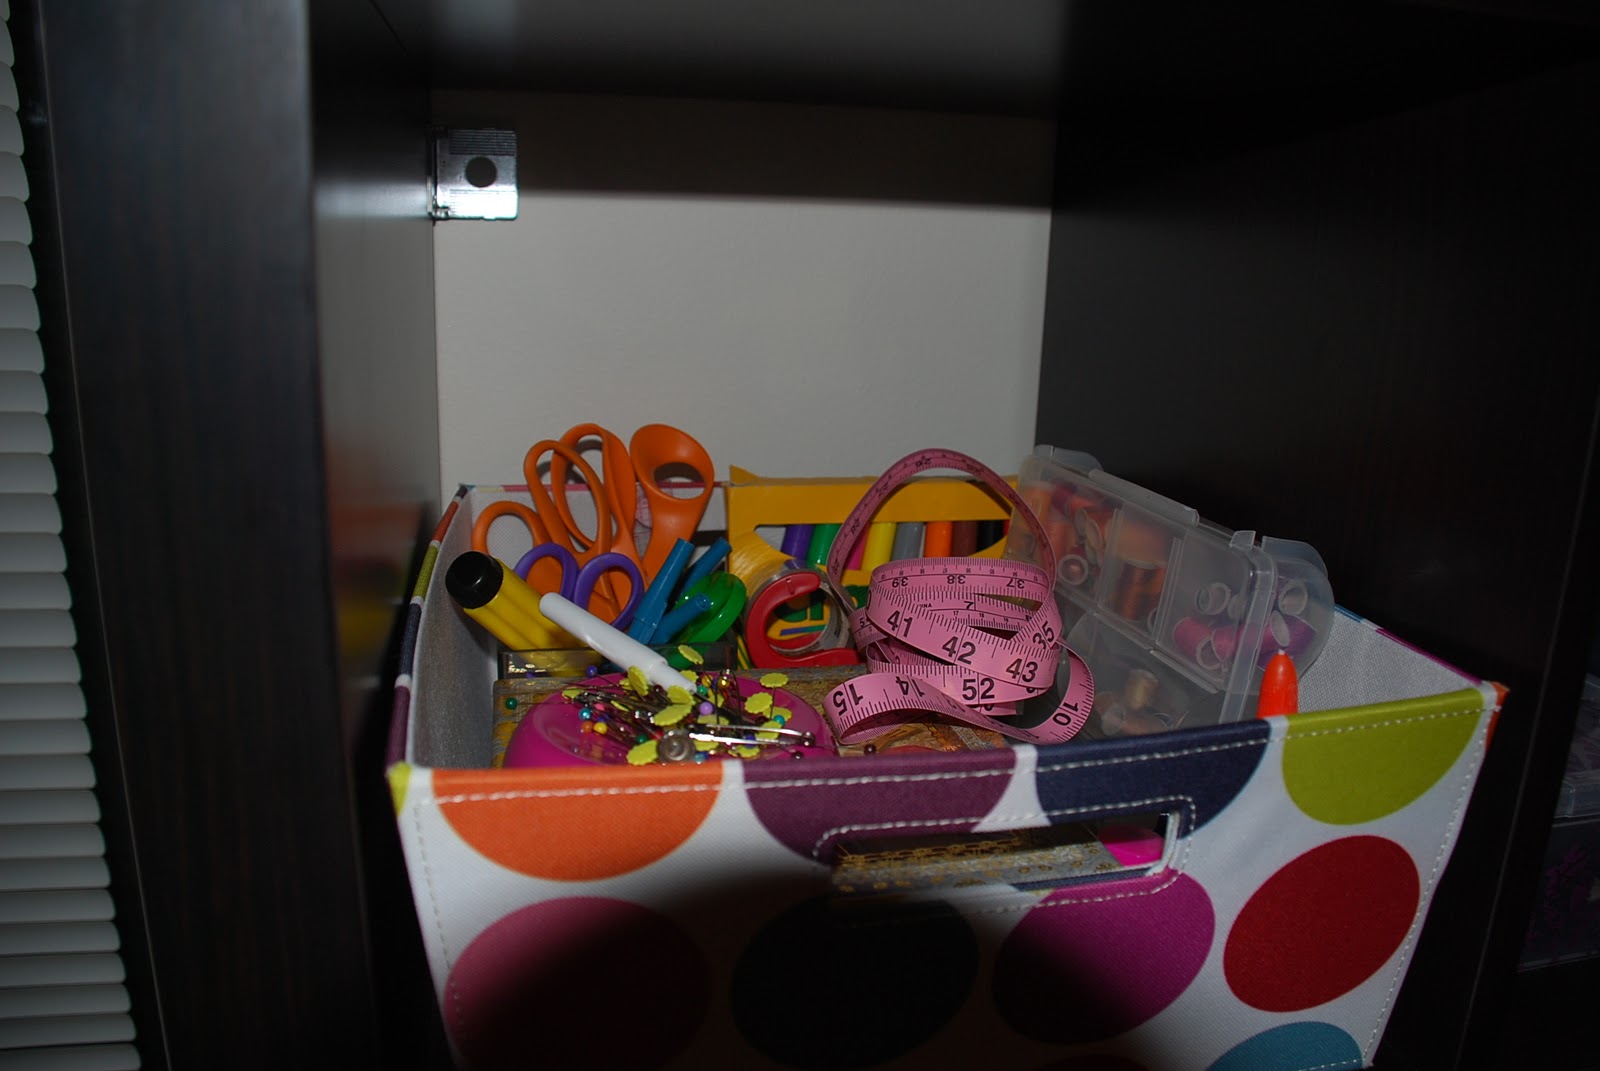 |
| 1 storage container for sewing/craft materials I use the most |
 | ||
| 1 storage container for miscellaneous material (this is actually a "file storage" box but when you know what you're looking for, you can see stuff for what it is, to you :) |

Hope everyone's having a great weekend!
This after looks great!! You're going as far to even organize the drawers. Woah, I got some catching up to do:)
ReplyDelete